Viking Self-Clean Oven Instructions: A Comprehensive Guide (Updated 12/17/2025)
Today, December 17, 2025, unlock the secrets to a pristine Viking oven! This guide navigates the self-clean cycle, addressing potential issues like door lock failures and error codes․
Modern ovens, including Viking models, utilize high temperatures to eliminate baked-on residue, offering convenience but requiring careful attention to safety and proper ventilation․
Understanding the history and mechanics of self-cleaning, alongside preventative maintenance, ensures optimal performance and extends the life of your valuable Viking appliance․
Understanding Viking Oven Self-Clean Technology
Viking ovens employ a high-heat self-clean technology, developed initially in the early 1960s for both gas and electric models․ This innovative feature aims to simplify oven maintenance by incinerating food residue within the oven cavity․ However, it’s more than just a “set it and forget it” process; understanding the nuances of Viking’s implementation is crucial․
The self-clean cycle operates at extremely high temperatures – significantly hotter than typical baking temperatures – to pyrolyze food soils․ This process breaks down organic matter into ash, which can then be easily wiped away․ While incredibly effective, this intense heat also necessitates specific safety precautions, including ensuring adequate ventilation and keeping pets and children away․
Viking’s self-clean function isn’t a squad of tiny scrubbers, as some myths suggest․ It’s a carefully engineered process that demands attention to detail, from removing racks and accessories to monitoring the cycle and addressing potential issues like door lock malfunctions or error codes․ Proper understanding leads to a cleaner oven and a safer experience․
The History of Self-Cleaning Ovens
The concept of self-cleaning ovens emerged in the early 1960s, initially as a solution to the laborious task of manual oven cleaning․ Early models, both gas and electric, utilized high temperatures to pyrolyze food residue, transforming it into ash․ This innovation aimed to reduce the need for harsh chemical cleaners and extensive scrubbing․
However, the initial implementation wasn’t without its challenges․ Concerns arose regarding fumes, odors, and potential safety hazards․ Over the decades, manufacturers refined the technology, incorporating improved ventilation systems, door locking mechanisms, and temperature controls to mitigate these risks․
The term “self-cleaning” itself is somewhat of a misnomer; while the oven handles the bulk of the cleaning process, some manual effort is still required to wipe away the resulting ash․ Despite this, self-cleaning ovens quickly gained popularity, becoming a standard feature in many modern kitchens, including those equipped with Viking appliances․ The evolution continues, focusing on efficiency and user safety․
How Self-Cleaning Cycles Work
Self-cleaning cycles operate on the principle of pyrolysis – heating the oven to extremely high temperatures, typically around 880-1000°F (470-540°C)․ At these temperatures, food residue undergoes a chemical decomposition, transforming organic matter into ash, carbon dioxide, and water vapor․
During the cycle, the oven door automatically locks for safety, preventing accidental opening due to the intense heat․ This locking mechanism is a crucial safety feature․ The high temperatures effectively burn away grease, spills, and baked-on food, leaving behind a minimal amount of ash․
Modern ovens, like Viking models, often feature different self-clean cycle options, varying in duration and intensity․ Some cycles are designed for light cleaning, while others are intended for heavily soiled ovens․ Proper ventilation is essential to dissipate odors and fumes generated during the process, ensuring a safe and effective cleaning experience․
Viking Oven Self-Clean Cycle Basics
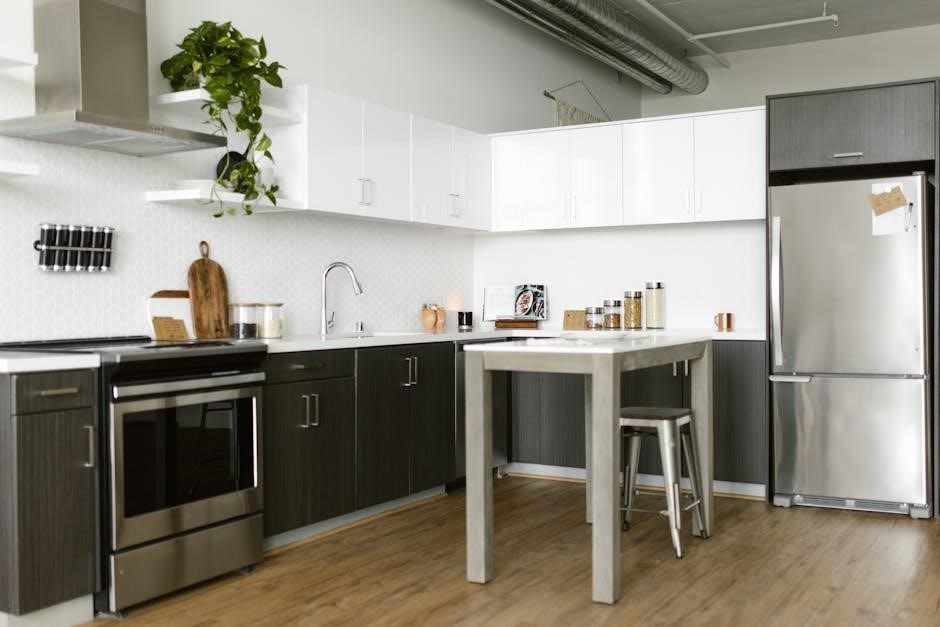
Viking ovens employ a high-temperature self-clean cycle designed for thorough interior cleaning․ This process utilizes intense heat to incinerate food residue, converting it into ash․ Cycle durations typically range from two to four hours, depending on the soil level selected․ Before initiating, it’s vital to remove racks and accessories, as they cannot withstand the extreme temperatures․
The oven door automatically locks at the cycle’s start and remains locked until the oven cools sufficiently – a critical safety feature․ During operation, some odor and fumes are normal, emphasizing the need for adequate ventilation․ Viking ovens often display cycle progress and any error codes encountered․
Post-cycle, allow the oven to cool completely before wiping away the remaining ash residue․ Regular use of the self-clean function, combined with routine wipe-downs, maintains optimal oven performance and longevity․
Preparing Your Viking Oven for Self-Cleaning
Thorough preparation is key to a successful Viking oven self-clean․ Begin by removing all loose debris and large food particles from the oven floor․ While the cycle incinerates residue, large pieces can contribute to smoke and odor․ A quick wipe-down beforehand minimizes this․ Inspect the oven window and seals for any damage; compromised seals can affect cycle efficiency․
Crucially, remove all oven racks, baking stones, and any other accessories․ These items are not designed to withstand the self-clean cycle’s extreme temperatures and can be damaged․ Ensure proper ventilation by opening kitchen windows or turning on the exhaust fan․ This mitigates potential fumes․
Finally, double-check for any forgotten items before initiating the cycle․ A clean start ensures optimal results and prevents potential issues․
Removing Oven Racks and Accessories
Prior to initiating the self-clean cycle on your Viking oven, complete removal of all oven racks and accessories is absolutely essential․ These components cannot withstand the intense heat – reaching temperatures exceeding 900°F – generated during the cleaning process․ Leaving them inside will cause discoloration, warping, and potential damage to the finish․
Carefully slide out each rack, noting its original position for easy re-installation post-cleaning․ Remove baking stones, broiler pans, temperature probes, and any other items stored within the oven cavity․ Even heat-resistant cookware should be removed․
Inspect the oven floor for any dropped crumbs or debris after rack removal․ A thorough sweep ensures a cleaner self-clean cycle․ Store the removed items in a safe, accessible location until the cycle is complete and the oven has cooled․
Ensuring Proper Ventilation
Adequate ventilation is paramount when running the self-clean cycle on your Viking oven․ The high temperatures involved inevitably produce fumes and odors, even in modern, well-sealed appliances․ These fumes, while generally not hazardous in small amounts, can be irritating to the respiratory system and unpleasant․
Open windows in the kitchen and adjacent rooms to create cross-ventilation․ Activate your kitchen’s exhaust fan, setting it to the highest speed․ If you have a range hood with an external vent, ensure it’s functioning correctly and directing air outdoors․
Consider the proximity of smoke detectors; the self-clean cycle may trigger false alarms․ Temporarily disabling or relocating sensitive detectors might be necessary, but remember to reactivate them immediately after the cycle concludes․ Prioritize a well-ventilated space for a safer and more comfortable cleaning experience․
Initiating the Self-Clean Cycle
Before starting the self-clean cycle on your Viking oven, double-check that you’ve removed all racks, baking stones, and any other accessories from the oven cavity․ These items can be damaged by the extreme heat or obstruct the cleaning process․ Ensure the oven door closes securely, as it will automatically lock during the cycle․
Locate the self-clean control knob or button on your Viking oven’s control panel․ Turn the knob to the “Self-Clean” setting or press the corresponding button․ The oven will likely prompt you to confirm your selection and may ask you to set the desired cleaning time․
Once confirmed, the oven will begin preheating, and the door will automatically lock․ Do not attempt to open the door during this process; it’s a safety feature․ The self-clean cycle is now initiated, and the oven will begin to heat to extremely high temperatures․
Step-by-Step Self-Clean Instructions
First, ensure the oven is completely empty, racks removed, and the door closes firmly․ Select the “Self-Clean” function on your Viking oven’s control panel․ The oven will then automatically lock the door for safety – do not force it open․
Next, the oven will begin a preheating phase, which can take 15-30 minutes․ During this time, avoid prolonged exposure to the oven as it heats up․ Once preheated, the self-clean cycle will commence, reaching extremely high temperatures to burn off food residue․
Allow the cycle to run uninterrupted, typically lasting 2-4 hours depending on the selected cleaning time and soil level․ Monitor the process, though direct observation isn’t necessary․ After completion, the oven will cool, and the door will unlock automatically․
Setting the Self-Clean Time
Viking ovens offer adjustable self-clean cycle durations, allowing customization based on the oven’s soil level․ Typically, options range from 2 to 4 hours; lighter soiling requires shorter cycles, while heavily soiled ovens benefit from extended cleaning․
To set the time, navigate to the “Self-Clean” function on the control panel․ Use the up and down arrow buttons, or the digital dial, to select your desired cleaning duration․ The display will clearly indicate the chosen time․
Consider the frequency of oven use and the type of cooking done when selecting a time․ For regular maintenance, a 2-hour cycle may suffice․ However, for infrequent cleaning or after roasting particularly messy dishes, a 4-hour cycle is recommended for optimal results․
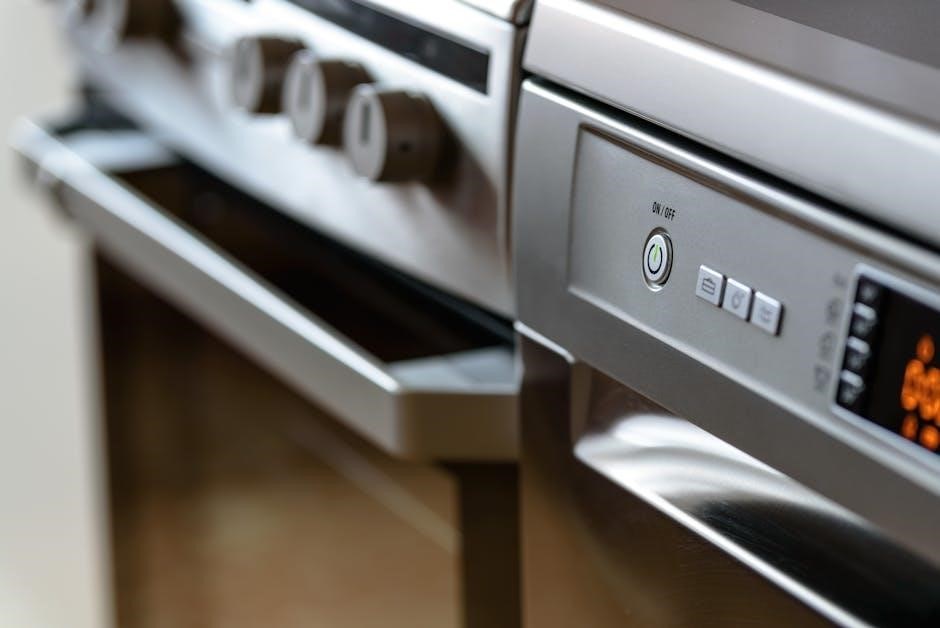
Locking the Oven Door
A crucial safety feature of the Viking self-clean cycle is the automatic door locking mechanism․ Once the cycle initiates, the oven door will securely lock, preventing accidental opening during the high-temperature cleaning process․ Do not attempt to force the door open while it’s locked; this could cause damage to the locking system or pose a safety hazard․
The locking system engages to maintain consistent internal temperatures and protect users from burns․ A red indicator light, typically located on the control panel, illuminates when the door is locked․ This light remains on throughout the entire self-clean cycle and during the cool-down period․
The door will automatically unlock once the oven has cooled sufficiently․ If the door fails to unlock, consult the troubleshooting section of this guide or contact Viking customer support․
Monitoring the Self-Clean Cycle
While the Viking self-clean cycle is automated, periodic monitoring is advisable․ Observe the oven’s exterior; a slight odor during the cycle is normal, stemming from the burning of food residue․ However, excessive smoke or a strong, acrid smell warrants immediate attention – ventilate the kitchen and potentially halt the cycle․
The control panel displays the cycle’s progress, indicating remaining time․ Avoid interrupting the cycle unless absolutely necessary, as this can affect cleaning effectiveness and potentially damage the oven․ Do not open the door during operation, as the internal temperatures are extremely high․
Pay attention to any unusual noises․ While some clicking or humming is typical, loud banging or grinding sounds should be investigated․ Remember the door remains locked for safety throughout the process․
Troubleshooting Common Self-Clean Issues
Encountering problems during the self-clean cycle is not uncommon․ If the oven won’t start, first verify the door is completely latched; a faulty door lock mechanism is a frequent culprit․ Check if the red self-clean light illuminates – if not, consult a qualified technician․
Error codes displayed on the control panel require referencing the Viking oven’s user manual for specific interpretations․ These codes pinpoint the issue, ranging from sensor malfunctions to heating element failures; Don’t attempt repairs yourself unless you’re experienced․
A cycle that stops prematurely might indicate a power interruption or a temperature sensor issue․ If the door lock remains engaged after the cycle completes, try a manual reset following the manual’s instructions․ Always prioritize safety and seek professional assistance when needed․
Oven Won’t Start Self-Clean
A Viking oven refusing to initiate the self-clean cycle is a common frustration․ The first step is confirming the oven door is securely latched; the cycle won’t begin if the lock isn’t fully engaged․ If the red self-clean indicator light isn’t illuminated, there may be a power supply issue or a problem with the control panel․
Check your circuit breaker to ensure the oven is receiving power․ If power is confirmed, inspect the door lock mechanism for any obstructions or damage․ A malfunctioning lock prevents the cycle from starting as a safety precaution․
If the light remains off despite these checks, professional service is recommended․ Avoid attempting complex repairs yourself․ A technician can diagnose and resolve electrical or mechanical issues preventing the self-clean function from activating․
Door Lock Mechanism Problems
A faulty door lock is a frequent culprit when a Viking oven’s self-clean cycle fails․ The lock’s primary function is safety, preventing accidental opening during the high-temperature cleaning process․ If the lock doesn’t engage fully, the cycle won’t start, even if the indicator light illuminates․
Inspect the lock for visible obstructions – food particles or debris can hinder its operation․ Gently try to move the lock mechanism; excessive resistance suggests a mechanical issue․ Avoid forcing it, as this could cause further damage․
If the lock seems stuck or unresponsive, professional repair is crucial․ Attempting to disassemble or repair the lock yourself can be dangerous and may void your warranty․ A qualified technician can diagnose the problem, replace damaged components, and ensure the lock functions correctly, restoring the self-clean feature․
Error Codes During Self-Clean
Viking ovens utilize error codes to communicate specific issues encountered during the self-clean cycle․ These codes aren’t merely random; they pinpoint the source of the problem, aiding in diagnosis and repair․ Ignoring these codes can lead to further damage or a prolonged malfunction․
Consult your Viking oven’s user manual for a comprehensive list of error codes and their corresponding meanings․ Common codes relate to temperature sensor failures, lock mechanism issues, or gas supply problems (for gas ovens)․
Document the error code displayed before attempting any troubleshooting․ Often, simply turning the oven off and then on again can reset the system and clear minor errors․ However, persistent codes necessitate professional service․ Do not attempt self-repair if you are unfamiliar with appliance diagnostics; contact a certified Viking technician for assistance․
Post-Self-Clean Procedures
Following the self-clean cycle, patience is key․ Allow the Viking oven to cool completely before attempting any cleaning or inspection․ The oven door will remain locked until the internal temperature sufficiently decreases, ensuring safety․
Once cooled, a fine ash residue will be present․ Gently wipe this away with a damp cloth; avoid abrasive cleaners, as they can damage the oven’s interior․ Inspect the oven floor and walls for any remaining debris or stubborn burnt-on spots․
A thorough check ensures complete cleanliness․ Replace oven racks and accessories․ Finally, run a brief, low-temperature cycle to eliminate any lingering odors․ Regular cleaning between self-clean cycles minimizes build-up and extends the life of your Viking oven, maintaining optimal performance․
Allowing the Oven to Cool
Immediately after the self-clean cycle concludes, the Viking oven will be extremely hot; Do not attempt to open the door, even if it appears unlocked, as severe burns are possible․ The locking mechanism is designed to prevent accidental opening until safe temperatures are reached․

Patience is paramount․ The cooling process can take several hours, depending on the cycle’s duration and intensity․ Avoid any activity that could disturb the oven during this period․ Resist the urge to force the door open; this could damage the locking mechanism․
Monitor the oven’s status light․ It will indicate when the oven has cooled sufficiently to unlock․ Only then should you proceed with post-clean procedures, such as wiping away ash residue and inspecting for remaining debris․ Prioritizing safety is crucial․
Wiping Away Ash Residue
Once the Viking oven has completely cooled and unlocked, a fine layer of ash residue will likely remain․ This is a normal byproduct of the self-clean cycle, consisting of burned food particles and grease․ Use a damp, soft cloth to gently wipe down all interior surfaces․
Avoid abrasive cleaners or scouring pads, as these can damage the oven’s enamel coating․ A mild dish soap solution can be used for stubborn spots, but ensure thorough rinsing with a clean, damp cloth afterward․ Pay particular attention to the oven door, racks (if replaced post-cycle), and the bottom surface․
Dispose of the ash residue responsibly․ It’s generally safe to discard with regular household waste, but avoid creating dust clouds during cleanup․ A thorough wipe-down ensures a sparkling clean oven and prepares it for your next culinary creation․
Checking for Remaining Debris
After wiping away the initial ash residue, a careful inspection for remaining debris is crucial․ Despite the high temperatures, particularly stubborn, heavily burnt-on food particles may persist in corners, along seams, or under heating elements․ Use a flashlight to illuminate these hard-to-reach areas․
For any lingering debris, a plastic scraper can be gently employed, avoiding excessive force to prevent enamel damage․ Combine this with a damp cloth and mild dish soap for effective removal․ Remember, patience is key – avoid abrasive tools that could scratch the oven’s interior․
Ensure all remnants are cleared before using the oven again․ Even small pieces of debris can smoke and create unpleasant odors during subsequent cooking․ A final, thorough visual check guarantees a clean and safe cooking environment․
Safety Precautions During Self-Clean
The self-clean cycle generates extremely high temperatures, demanding strict adherence to safety protocols․ Avoid standing directly in front of the oven during operation, as the heat released can be intense․ Ensure adequate ventilation by opening kitchen windows or utilizing exhaust fans to dissipate fumes and odors․
Critically, keep children and pets away from the oven throughout the entire cycle and cooling period․ The exterior surfaces become very hot, posing a burn risk․ Never attempt to open the oven door manually during self-cleaning; the locking mechanism is designed for safety․
Be mindful of potential risks, including the possibility of smoke and strong smells․ Individuals with respiratory sensitivities should take extra precautions․ If unusual odors or excessive smoke are detected, immediately stop the cycle and consult a qualified technician․
Avoiding Fumes and Odors
The self-clean cycle inevitably produces fumes and odors as food residue is incinerated at high temperatures․ Proactive ventilation is paramount; open kitchen windows and activate your range hood fan to create cross-flow airflow․ This minimizes the concentration of airborne particles and unpleasant smells․
Prior to initiating the cycle, remove any items sensitive to odor, such as delicate artwork or fabrics․ Consider the proximity of smoke detectors; the cycle may trigger false alarms․ If you, or anyone in your household, has respiratory issues, exercise extra caution and ensure robust ventilation․
While modern Viking ovens are designed to minimize fume production, some odor is unavoidable․ A slight smell is normal, but strong, acrid odors warrant immediate attention – stop the cycle and investigate potential issues․
Pet and Child Safety
The self-clean cycle reaches extremely high temperatures, posing significant risks to both pets and children․ Absolute supervision is crucial throughout the entire process․ The oven door locks automatically, but relying solely on this mechanism is insufficient for ensuring safety․
Keep children and pets completely away from the kitchen during the cycle and for a considerable period afterward, until the oven has fully cooled․ The exterior surfaces can become very hot, causing burns upon contact․ Explain the dangers to older children in age-appropriate terms․
Never allow pets or children to play near the oven, even when it’s not in self-clean mode․ Establish a clear “no-go” zone around the appliance․ Consider using a physical barrier to prevent accidental access․ Prioritize their well-being above all else during this process․
Potential Risks of Self-Cleaning
While convenient, the self-cleaning cycle isn’t without potential drawbacks․ The intense heat can sometimes damage the oven’s electronic components or even the enamel coating over time․ A burning smell and fumes are common, though usually dissipate with proper ventilation․
Food residue can create unpleasant odors, and in rare cases, may even trigger smoke․ Pre-cleaning to remove large debris minimizes this risk․ Be aware that self-cleaning doesn’t eliminate all stains or spills; some may require manual attention afterward․
The high temperatures can also affect nearby cabinetry, particularly if it’s sensitive to heat․ Regularly inspect your Viking oven for any signs of damage and consider the potential long-term effects of frequent self-cleaning cycles․
Maintaining Your Viking Oven After Self-Cleaning
Post-self-clean care is crucial for a lasting, pristine Viking oven․ Once cooled completely, gently wipe away any fine ash residue with a damp cloth – avoid abrasive cleaners․ Inspect the oven floor and walls for any remaining debris, addressing it manually if necessary․
Regular cleaning between self-clean cycles significantly reduces build-up, lessening the need for frequent high-heat cleaning․ A simple wipe-down after each use prevents stubborn stains․ Consider using Viking’s recommended oven cleaner for spot treatments․
Preventative measures, like using oven liners or baking sheets, minimize spills and splatters․ Consistent care extends the life of your appliance and maintains optimal performance, ensuring years of reliable service from your Viking oven․
Regular Cleaning Between Cycles
Consistent, light cleaning dramatically reduces the frequency needed for the intense self-clean cycle․ After each use, a quick wipe-down of spills and splatters prevents them from baking onto the oven’s surfaces, simplifying future cleaning tasks․
Employing a mild dish soap and warm water solution is often sufficient for routine cleaning․ Avoid abrasive cleaners, which can damage the enamel coating․ For tougher, but not baked-on, residue, consider Viking’s recommended oven cleaning products․
Regular attention prevents the accumulation of grease and food particles, preserving oven efficiency and minimizing odors․ This proactive approach extends the lifespan of your Viking oven and ensures consistently excellent cooking results, saving you time and effort․
Preventative Measures to Reduce Build-Up
Minimizing oven mess begins with mindful cooking practices․ Utilizing oven liners or baking sheets beneath dishes containing sauces or prone-to-splatter ingredients significantly reduces direct contact with the oven floor․
Covering dishes, especially during roasting or baking, contains splatters and prevents grease from spreading․ Consider using lids or aluminum foil, ensuring adequate ventilation for proper cooking․ Regularly inspect and clean the oven door seal to maintain a tight closure, preventing spills from escaping․
Promptly addressing spills as they occur prevents them from carbonizing and becoming difficult to remove․ These simple preventative steps dramatically lessen the burden on the self-clean cycle, preserving its effectiveness and extending your Viking oven’s lifespan․
Extending the Life of Your Viking Oven
Consistent, gentle care is paramount for longevity․ While the self-clean cycle is convenient, frequent use at extremely high temperatures can stress oven components over time․ Supplementing with regular manual cleaning between cycles significantly reduces the need for intense heat․
Avoid abrasive cleaners and scouring pads that can damage the oven’s interior surfaces․ Opt for mild detergents specifically designed for ovens, and utilize soft cloths or sponges․ Inspect the door gasket regularly for wear and tear, replacing it promptly if damaged to maintain efficient heating and prevent energy loss․
Professional servicing annually ensures optimal performance and identifies potential issues before they escalate, safeguarding your investment in a high-quality Viking appliance for years to come․