French manicure nail guide strips are a convenient and innovative tool for achieving the classic white-tip, nude-base look at home. They offer precision, ease of use, and professional results without salon visits. Perfect for beginners and nail enthusiasts alike, these strips ensure smooth application and clean lines, making it simple to create a timeless, elegant manicure effortlessly.
What Are French Manicure Nail Guide Strips?
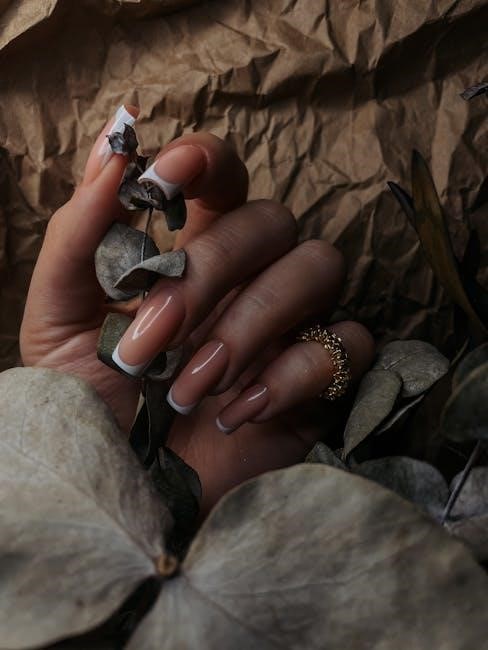
French manicure nail guide strips are adhesive strips designed to help create the iconic white-tip, nude-base French manicure look. These strips are typically made of flexible, pre-shaped material and are placed along the tip of the nail to guide the application of polish. They come in various styles, including curved or straight edges, to suit different nail shapes and preferences. Some strips are pre-glued for easy application, while others require a light tacky substance to adhere properly. Their primary purpose is to ensure clean, sharp lines between the tip and the base of the nail, eliminating the need for freehand painting. This makes them ideal for beginners or those looking for a salon-quality finish at home. French manicure nail guide strips are a modern solution to achieve a timeless, elegant nail design with precision and ease.
History and Evolution of French Manicure
The French manicure has a rich history that dates back to the 1930s, when it was first popularized by Hollywood makeup artists and later by cosmetic mogul Max Factor. Originally designed for actresses to complement their on-screen appearances, the classic white-tip, nude-base design became synonymous with elegance and sophistication. Over the years, the French manicure evolved from a niche trend to a global phenomenon, embraced by women of all styles. In the 1990s and early 2000s, it became a staple in nail salons worldwide, with variations emerging to suit different preferences. The introduction of at-home nail guide strips revolutionized the process, making it accessible to everyone. Today, the French manicure remains a timeless classic, with modern adaptations like gel and stick-on variations keeping it fresh and trendy. Its enduring appeal lies in its versatility and the ability to transcend seasonal fashion trends.
Benefits of Using Nail Guide Strips

Nail guide strips offer numerous advantages, making them a favorite among nail enthusiasts. They provide precision and consistency, ensuring clean, sharp lines for a professional finish. These strips are especially useful for those who struggle with freehand painting, as they eliminate the risk of smudging or uneven edges. Guide strips also save time, as they act as a stencil, allowing for quick and accurate application. They are ideal for both beginners and experienced users, offering a foolproof way to achieve salon-quality results at home. Additionally, guide strips minimize cleanup, as they prevent polish from spreading beyond the desired area. Their reusable nature makes them a cost-effective option, and they come in various sizes and shapes to accommodate different nail types. Whether you’re aiming for a classic French manicure or experimenting with bold designs, nail guide strips are an essential tool for a flawless, polished look.

Materials and Tools Needed
Nail buffers, French tip guides, manicure pens, nail art striper brushes, clippers, polish remover, and protective strips are essential tools. These items ensure smooth preparation, precise application, and clean, professional-looking results for your manicure.
Nail Preparation Essentials
Proper nail preparation is vital for a flawless French manicure. Begin by cleaning and shaping your nails with clippers to achieve your desired shape. Next, use a nail buffer to smooth ridges and buff the surface for better polish adhesion. Remove any oils or residue with a polish remover to ensure a clean canvas. Lightly push back cuticles and trim excess skin to create a neat appearance. For those new to French manicures, consider using nail guide strips to help achieve crisp, clean lines. Finally, gently wipe nails with a lint-free wipe to remove dust or debris. These steps ensure your nails are perfectly prepared for the application of guide strips and polish, leading to a professional-looking finish. Proper preparation prevents peeling and extends the wear of your manicure, making it a crucial step in the process.

Guide Strips and Their Types
French manicure nail guide strips are available in various types to suit different preferences and skill levels. Adhesive vinyl strips are the most common, offering precise lines and easy removal. Paper guides are a budget-friendly option, ideal for those who prefer a non-adhesive solution. Reusable silicone strips are durable and eco-friendly, making them a popular choice for frequent use. Pre-shaped guides are designed for specific nail shapes, such as almond or square, ensuring a perfect fit. For added creativity, nail art strips with intricate designs or glitter accents can be used. Additionally, French tip guides are specifically crafted for the classic white-tip look, featuring a curved edge for natural alignment. These options cater to both beginners and experienced users, providing versatility and customization for achieving the desired manicure style. With so many types available, selecting the right guide strip can enhance the overall outcome of your French manicure.

Additional Tools for a Polished Look
To achieve a professional-quality French manicure, several additional tools can enhance your results. A nail buffer is essential for smoothing the nail surface, ensuring a flawless base for polish. Nail clippers and a nail file help shape and refine the edges, creating a clean finish. A lint-free wipe or cleanser is crucial for removing oils and residue, improving polish adhesion. Cuticle pushers and nippers allow for gentle grooming around the nail bed, maintaining a neat appearance. For precise touch-ups, a nail art pen or a small brush dipped in remover can clean up any mistakes. Finally, a UV or LED lamp can be used to cure gel polish, ensuring a long-lasting finish. These tools collectively contribute to a polished, salon-quality manicure, making the process easier and the results more impressive.
Step-by-Step Application Guide

A simple step-by-step guide for applying French manicure nail strips, including preparation, guide application, painting, and finishing touches to achieve a professional look at home.
Preparation and Base Coat
Preparation is key to achieving a flawless French manicure. Start by cleaning your nails with a lint-free wipe or nail cleanser to remove oils and residue. Shape your nails using a nail clipper or file, ensuring smooth edges. Buff the nails lightly with a buffer to create a smooth surface for the polish to adhere to. Next, apply a thin layer of clear base coat to protect your nails and promote even adhesion of the nail strips. Allow the base coat to dry completely before proceeding. Proper preparation ensures a professional finish and longevity of your manicure. This step is essential for creating a clean canvas for the French tip design, making it easier to apply the guide strips accurately. A well-prepared nail surface guarantees crisp, sharp lines and a polished look. Remember, patience during this step will lead to better results in the end.
Applying the Guide Strips
Applying French manicure nail guide strips is a straightforward process that requires attention to detail for precise results. Start by selecting the right size of guide strip for each nail and peel it off the backing paper. Align the curved edge of the strip with the tip of your nail, ensuring it follows the natural shape. Press the strip firmly onto the nail surface, smoothing it out from the center to the edges to avoid air bubbles. For a crisp line, stretch the strip slightly as you apply it. Once the strip is securely in place, proceed with painting the tip of your nail. After allowing the polish to dry, carefully remove the guide strip at an angle to maintain the sharp line. This step is crucial for achieving the iconic white tip of a French manicure. Proper application ensures clean, defined lines that enhance the overall look. Patience and steady hands are key to a flawless finish.
Tip: Use a cuticle pusher or orangewood stick to gently press the strip into place for added precision.
Painting and Finishing Touches
Once the guide strips are securely in place, it’s time to paint the tip of your nail. Dip a nail polish brush into your chosen white polish, wiping off any excess on the rim of the bottle. Paint smooth, steady strokes across the tip, staying within the guide strip’s edge. Allow the first coat to dry completely before applying a second coat for opacity. After painting, let the polish dry for a few minutes to prevent smudging. Gently peel off the guide strips at an angle to reveal a sharp, clean line. Finish by applying a thin layer of clear top coat to seal the polish and add shine. For any minor smudges, use a cotton swab dipped in nail polish remover to clean up. Finally, moisture-rich cuticle oil can be applied to hydrate the nails and cuticles, completing the polished French manicure look. This step ensures durability and a professional finish.
Tip: Use a steady hand and light pressure while painting to avoid pooling polish at the cuticles.