Safety 1st 3-in-1 Thermometer Instructions: A Comprehensive Guide
This guide details using the Safety 1st Rapid Read 3-in-1 Thermometer, offering insights into its features and ensuring accurate temperature readings for family wellness․
Understanding the 3-in-1 Functionality
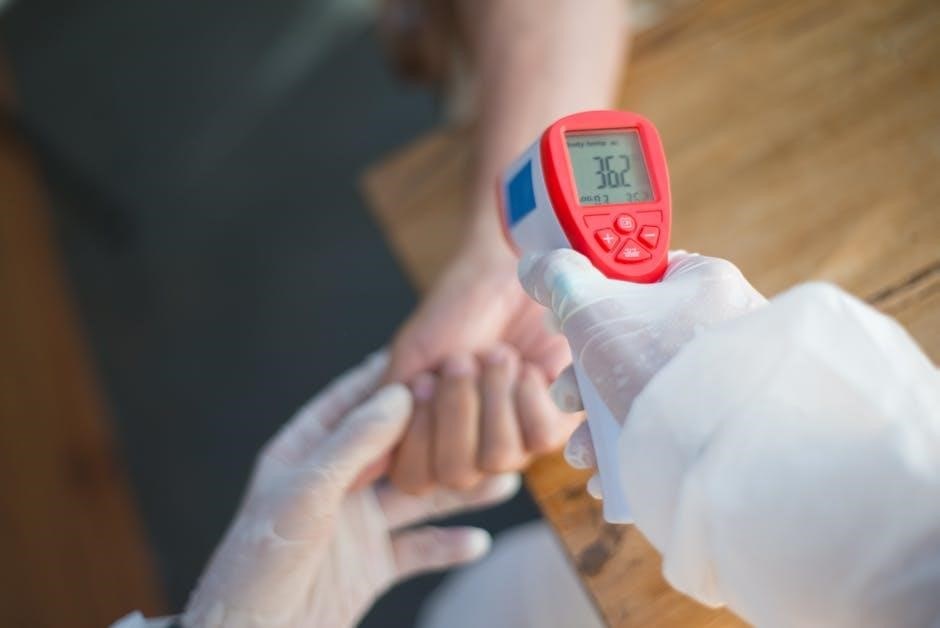
The Safety 1st 3-in-1 Thermometer distinguishes itself through versatile temperature-taking capabilities, offering forehead (temporal artery), ear (tympanic), and object/room measurement modes․ This multifunctionality provides convenience and adaptability for various needs, ensuring you can effectively monitor health in different scenarios․
This design eliminates the need for multiple devices, streamlining the process of checking temperatures for individuals of all ages and even inanimate objects․ The integration of these three methods reflects a proactive approach to health management, aligning with recommended practices for safety and well-being․ Digitalization and automation, like this thermometer, enhance safety by providing quick and accurate readings․
Ultimately, the 3-in-1 functionality empowers users with a comprehensive tool for maintaining a safe and healthy environment, contributing to the prevention of illness and promoting overall wellness within the family․

What’s Included in the Box
Upon opening your Safety 1st Rapid Read 3-in-1 Thermometer package, you’ll find several key components designed for optimal use and hygiene․ The core item is, of course, the thermometer unit itself, featuring an easy-to-read digital display and intuitive button controls․
Alongside the thermometer, the box contains protective probe covers – essential for maintaining sanitary conditions when taking ear temperature readings․ These disposable covers prevent cross-contamination and ensure accurate results․ You will also receive a quick start guide, providing basic instructions for immediate use, and a detailed user manual offering comprehensive guidance on all features․
Finally, the package includes batteries, allowing you to begin using the thermometer right away․ These components work together to deliver a reliable and convenient temperature-monitoring experience, supporting proactive health management․
Key Features and Benefits
The Safety 1st Rapid Read 3-in-1 Thermometer boasts a multitude of features designed for convenience and accuracy․ Its primary benefit lies in its versatility – capable of taking forehead (temporal artery), ear (tympanic), and object/room temperatures․ This adaptability makes it ideal for various situations and age groups․
A standout feature is the rapid one-second reading time, providing quick results when you need them most․ The color-coded fever alarm visually indicates elevated temperatures, simplifying interpretation․ A silent mode allows for discreet measurements, perfect for sleeping children․
Furthermore, the thermometer incorporates a memory recall function, enabling you to track temperature changes over time․ Digitalization and automation enhance safety, and the device’s design prioritizes user-friendliness, making it a valuable tool for proactive health monitoring․

Taking a Forehead (Temporal Artery) Temperature
Forehead temperature measurement is a non-invasive method, offering a quick and comfortable way to assess body temperature using the temporal artery․
Preparing for Forehead Measurement
Before initiating a forehead temperature reading with the Safety 1st 3-in-1 Thermometer, ensure the probe lens is clean and free from obstructions like dust or debris; this guarantees accurate results; The user should be in a stable environment, avoiding recent physical activity, hot or cold beverages, or bathing, as these factors can temporarily influence body temperature․
Position the individual comfortably, ideally while seated or lying down․ Remove any hair or objects that might interfere with a smooth scan across the forehead․ It’s crucial to understand that ambient room temperature can also affect readings, so maintain a consistent environment if possible․ Proper preparation minimizes potential errors and contributes to a reliable temperature assessment, supporting informed health decisions for your family․ Always refer to the complete instruction manual for detailed guidance․
Step-by-Step Forehead Temperature Reading
To take a forehead temperature, power on the Safety 1st 3-in-1 Thermometer․ Select the forehead mode, if necessary, ensuring the correct setting is active․ Gently position the thermometer’s probe in the center of the forehead, between the eyebrows and hairline․ Maintain consistent contact, pressing the scan button to initiate the reading․
Hold the device steady until the beep confirms completion – typically within one second for a rapid read․ Avoid movement during the scan for optimal accuracy․ The temperature will then display on the screen․ Remember to note any color-coded fever indicators, as these provide a quick visual assessment․ Repeat the process if unsure, ensuring consistent technique for reliable results․ Refer to the manual for specific interpretation of readings․

Interpreting Forehead Temperature Results
Understanding the displayed temperature is crucial for assessing health․ A normal forehead temperature generally falls between 97․5°F (36․4°C) and 99․5°F (37․5°C)․ However, individual baselines can vary․ Pay attention to the Safety 1st thermometer’s color-coded fever indicators: green typically signifies normal, yellow indicates a slight fever, and red suggests a higher fever․
Consider the patient’s age and overall condition when interpreting results․ Consult a healthcare professional if the temperature is consistently elevated or accompanied by other symptoms․ Remember that forehead readings can be influenced by external factors like sweating or ambient temperature․ Always prioritize professional medical advice for diagnosis and treatment decisions, utilizing the thermometer as a screening tool;
Taking an Ear (Tympanic) Temperature
Ear temperature measurement requires careful probe insertion for accuracy; it’s a quick method, but proper technique is essential for reliable results and safety․
Preparing for Ear Measurement
Before taking an ear temperature, ensure the ear canal is clear of any obstructions like earwax․ Gently straighten the ear canal by pulling the ear gently upward and backward (for adults and older children) or downward and backward (for infants)․ This straightening action is crucial for obtaining an accurate reading, as it allows the thermometer probe to align properly with the tympanic membrane – the eardrum․
It’s important to use a fresh, clean probe cover each time you take a measurement to prevent cross-contamination and ensure hygienic use․ Attach a new probe cover securely to the thermometer․ Avoid taking ear temperatures if the individual has an ear infection, excessive earwax buildup, or has recently been swimming, as these factors can affect the accuracy of the reading․ Always review the device manual for specific preparation guidelines and safety information related to ear temperature measurement․
Proper Ear Probe Insertion Technique
Gently insert the thermometer probe into the ear canal, aiming slightly upward․ Do not force the probe; it should enter easily․ Continue inserting until a secure seal is formed within the ear canal – this is vital for an accurate temperature reading․ The insertion depth will vary depending on age; consult the device’s manual for specific guidance․
Press the measurement button while maintaining a firm, gentle hold on the thermometer․ Avoid moving the thermometer during the measurement process, as movement can distort the reading․ The measurement should be completed within a second or two, indicated by a beep or visual signal on the display․ Once the measurement is complete, carefully remove the thermometer from the ear and discard the used probe cover․ Always prioritize gentle handling and avoid any forceful insertion․
Understanding Ear Temperature Readings & Accuracy
Ear (tympanic) temperatures are generally considered reliable, but accuracy depends heavily on proper technique․ A normal ear temperature typically ranges from 97․8°F (36․5°C) to 100․4°F (38°C)․ Readings slightly higher or lower are common and don’t necessarily indicate a fever․ Factors like earwax buildup, ear canal size, and improper probe placement can affect accuracy․
It’s important to remember that ear temperatures tend to be slightly higher than oral temperatures․ If concerned, confirm with another method․ Consistent technique is key for comparable readings․ The Safety 1st thermometer aims for quick, accurate results, but understanding potential variations is crucial․ Always consult a healthcare professional for diagnosis and treatment of any illness․
Taking an Object/Room Temperature

Utilize the thermometer to safely measure temperatures of surfaces like baby bottles or room environments, ensuring optimal comfort and safety for your little one․
Suitable Objects for Temperature Measurement
The Safety 1st 3-in-1 thermometer excels at measuring the temperature of various objects and surfaces, providing valuable insights into your environment․ Ideal candidates include baby bottles or formula, ensuring they are at a safe and comfortable temperature for feeding․ You can also assess the warmth of bathwater, preventing scalding and guaranteeing a pleasant bathing experience for your child․
Furthermore, this thermometer is adept at gauging room temperature, helping you maintain an optimal climate for your baby’s well-being․ Consider checking the temperature of baby food jars or purees before serving, confirming they’re neither too hot nor too cold․ Avoid measuring the temperature of reflective or transparent surfaces, as these may yield inaccurate readings․ Prioritize non-reflective, matte surfaces for the most reliable results, contributing to a safer and more comfortable environment for your loved ones․
How to Measure Object/Room Temperature
To measure object or room temperature with the Safety 1st 3-in-1 thermometer, press the object/room temperature button – typically indicated by a droplet symbol․ Ensure the thermometer is within one inch of the target surface, avoiding direct contact․ Press the scan button to initiate the measurement; the reading will display within one second, offering a rapid assessment of the temperature․
For room temperature, aim the thermometer towards the center of the space, away from direct sunlight or heat sources․ When measuring an object, select a representative area for an accurate reading․ Remember that different materials retain heat differently, so consider this when interpreting results․ The thermometer’s quick response time and ease of use make it a convenient tool for ensuring a safe and comfortable environment for your family, providing peace of mind with every scan․
Applications of Object/Room Temperature Readings
Object and room temperature readings from the Safety 1st 3-in-1 thermometer extend beyond simple comfort checks․ They are invaluable for baby care, ensuring bathwater is safely warm – ideally around 100°F (38°C) – and formula is at a suitable temperature․ Monitoring room temperature helps maintain a comfortable sleep environment, crucial for infant health and wellbeing․
Beyond childcare, these readings assist in verifying food storage temperatures, confirming they remain within safe ranges to prevent spoilage․ You can also assess the temperature of surfaces, like radiators or cribs, to avoid potential burns․ This versatile functionality contributes to a safer home environment, proactively addressing potential hazards and promoting overall family health․ Utilizing these features enhances preventative care and provides valuable insights into your surroundings․

Understanding the Display and Indicators
The Safety 1st thermometer’s display features a clear digital readout, fever indicators with color-coding, a low battery signal, and memory recall functionality for tracking․
Fever Indicator and Color Coding
The Safety 1st 3-in-1 thermometer utilizes a color-coded system to quickly and easily interpret temperature readings, providing a visual indication of fever status․ A green display signifies a normal temperature, offering reassurance and peace of mind․ When the temperature rises, the display will change to yellow, indicating a slightly elevated temperature that warrants monitoring․
If the temperature continues to increase, the display will turn red, signaling a fever․ This clear color-coding allows for immediate recognition of potential illness and prompts appropriate action, such as administering medication or seeking medical advice․ The thermometer’s fever alarm further enhances this feature, providing an audible alert when a fever is detected․ Understanding these indicators is crucial for proactive health management and ensuring timely care for your loved ones, contributing to overall family wellness and safety․
Low Battery Indicator
The Safety 1st 3-in-1 thermometer features a low battery indicator, ensuring you’re never caught off guard with a non-functional device during critical moments․ This indicator, typically represented by a flashing battery symbol on the display, alerts you when the battery power is running low and needs replacement․
Prompt battery replacement is essential for maintaining accurate and reliable temperature readings․ Ignoring the low battery warning can lead to inaccurate results, potentially delaying appropriate medical attention․ It’s a good practice to keep spare batteries readily available, especially during cold and flu season, or when traveling․ Regularly checking the battery level contributes to the thermometer’s consistent performance and your family’s health security, providing peace of mind and uninterrupted functionality when you need it most․
Memory Recall Function
The Safety 1st 3-in-1 thermometer is equipped with a convenient memory recall function, allowing you to track temperature trends over time․ This feature stores previous readings, enabling you to compare current measurements with past ones, which can be invaluable when monitoring a fever’s progression or evaluating the effectiveness of medication․

Accessing the memory is usually straightforward, often involving a simple press of a dedicated “Memory” or “Recall” button․ The display will then show the most recent readings, and you can cycle through them using the same button․ This historical data provides a valuable insight into your family’s health patterns, aiding in informed decision-making and potentially assisting healthcare professionals with accurate diagnoses․ Regularly reviewing stored temperatures can help identify subtle changes and ensure timely intervention if needed․

Safety Precautions and Maintenance
Proper cleaning and storage are vital for maintaining accuracy and hygiene; always follow the disinfection procedures outlined in this guide for optimal performance․
Cleaning and Disinfection Procedures
Maintaining a hygienic thermometer is crucial, especially when used for multiple family members․ After each use, gently wipe the thermometer probe – whether forehead or ear – with a soft cloth lightly dampened with 70% isopropyl alcohol․ Ensure no liquid enters the internal components․
Avoid using abrasive cleaners, harsh chemicals, or submerging the thermometer in water, as these can damage the sensitive sensors․ Allow the alcohol to air dry completely before storing․ For the external surfaces of the thermometer, a similar alcohol wipe is sufficient․
Regular disinfection is recommended, particularly if the thermometer has been used by someone exhibiting symptoms of illness․ Always inspect the probe for any visible damage before and after cleaning․ Proper cleaning extends the lifespan of your Safety 1st thermometer and ensures accurate readings․
Battery Replacement Instructions
When the low battery indicator appears on the display, it’s time to replace the batteries to ensure accurate temperature readings․ This thermometer typically requires two AAA batteries․ Locate the battery compartment, usually on the back or side of the device, and gently slide open the cover․
Remove the old batteries, noting the correct polarity (+ and -) as indicated inside the compartment․ Insert the new AAA batteries, again ensuring correct polarity alignment․ Close the battery compartment cover securely․
Dispose of used batteries responsibly, following local regulations for battery recycling․ Incorrect battery installation can damage the thermometer․ If the thermometer doesn’t power on after replacement, double-check the battery polarity and ensure the batteries are fresh․
Storage Guidelines
To maintain the longevity and accuracy of your Safety 1st 3-in-1 Thermometer, proper storage is essential․ When not in use, store the thermometer in a cool, dry place, away from direct sunlight and extreme temperatures․ Avoid storing it in humid environments like bathrooms, as moisture can damage the internal components․
Keep the thermometer out of reach of children to prevent accidental damage or misuse․ A dedicated storage case or drawer is ideal․ Do not store the thermometer with other electronic devices that may interfere with its operation․
Regularly check the battery compartment for any signs of corrosion, especially if the thermometer has been stored for an extended period․ Proper storage ensures the thermometer remains a reliable tool for monitoring health and wellness․