Welcome to the Singer 401a Sewing Machine Manual, your comprehensive guide to understanding and operating this versatile sewing machine. This manual provides detailed instructions for setup, threading, maintenance, and troubleshooting, ensuring optimal performance for both beginners and experienced sewists.
1.1 Overview of the Singer 401a Sewing Machine
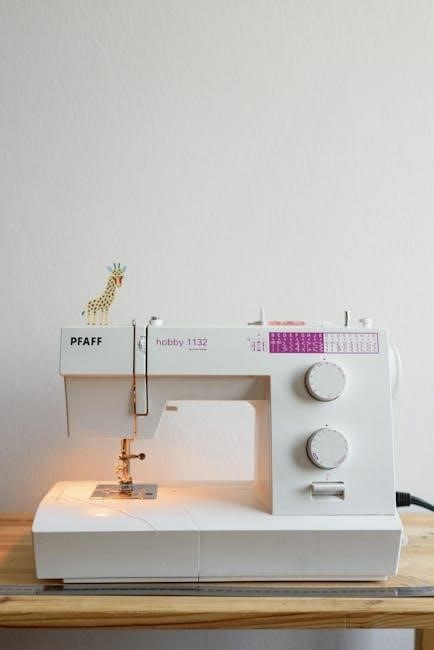
The Singer 401a is a versatile and durable sewing machine designed for a wide range of sewing tasks. Known for its automatic features and user-friendly design, it includes a built-in stitch chart, drop-in bobbin system, and a focused built-in light for improved visibility. Its slant-o-matic design enhances sewing comfort, making it ideal for both beginners and experienced sewists. The machine supports various stitches, including straight and zigzag options, ensuring flexibility for different projects. With its robust construction and advanced features, the Singer 401a remains a popular choice for sewing enthusiasts.
1.2 Importance of the Manual for Users
The Singer 401a manual is essential for users to maximize the machine’s potential. It provides clear instructions for setup, threading, and operation, ensuring proper use and maintenance. The manual includes diagrams, stitch charts, and troubleshooting tips, making it a vital resource for both beginners and experienced sewists. Regular reference to the manual helps prevent errors, extends machine lifespan, and enhances sewing efficiency.
Key Features of the Singer 401a Sewing Machine
The Singer 401a features an automatic built-in stitch chart, a built-in light for visibility, and a convenient drop-in bobbin system. It offers versatile stitching options, including straight and zigzag stitches, with adjustable length and width settings for precision sewing. These features make it a reliable choice for both basic and decorative sewing projects.
2.1 Built-in Stitch Chart and Automatic Features
The Singer 401a boasts a built-in stitch chart and automatic features, including an eye-level stitch selector for easy navigation. The automatic tension ensures consistent stitching, while the built-in light illuminates the sewing area, enhancing visibility. These features streamline the sewing process, allowing users to focus on their projects with precision and ease, whether sewing straight lines or intricate designs.
2.2 Built-in Light for Improved Visibility
The Singer 401a features a built-in light that illuminates the sewing area, enhancing visibility for precise stitching. This feature is particularly useful when working with dark fabrics or intricate details, reducing eye strain and improving accuracy. The focused lighting ensures that every stitch is clearly visible, making the sewing process more efficient and enjoyable, even in low-light conditions.
2.3 Drop-In Bobbin and Needle Clamp Design
The Singer 401a features a convenient drop-in bobbin system, allowing easy and quick bobbin replacement without removing the needle plate. The needle clamp design securely holds the needle in place, ensuring proper alignment and reducing the risk of needle movement during sewing. These designs streamline the sewing process, making it more efficient and user-friendly for sewists of all skill levels.

Setting Up the Singer 401a Sewing Machine
Setting up the Singer 401a involves unpacking, mounting on a stable surface, and initial threading. Proper setup ensures smooth operation and optimal performance for sewing tasks.
3.1 Unpacking and Preparing the Machine
Begin by carefully unpacking the Singer 401a sewing machine from its box. Remove all packaging materials and accessories. Inspect the machine for any damage or debris. Gently wipe the exterior with a soft cloth to remove dust. Ensure all parts, such as the power cord, bobbin, and needles, are included. Refer to the manual for specific unpacking instructions to prepare the machine for first-time use.
3.2 Mounting the Machine on a Desk or Table
To mount the Singer 401a, clear the area and locate the hinges at the back. Carefully lift the front, supporting the machine’s weight, and tilt it back. Place it on a sturdy desk or table, ensuring stability. Align the machine properly and secure it as per the manual’s instructions to prevent movement during use. This setup ensures optimal performance and safety while sewing.
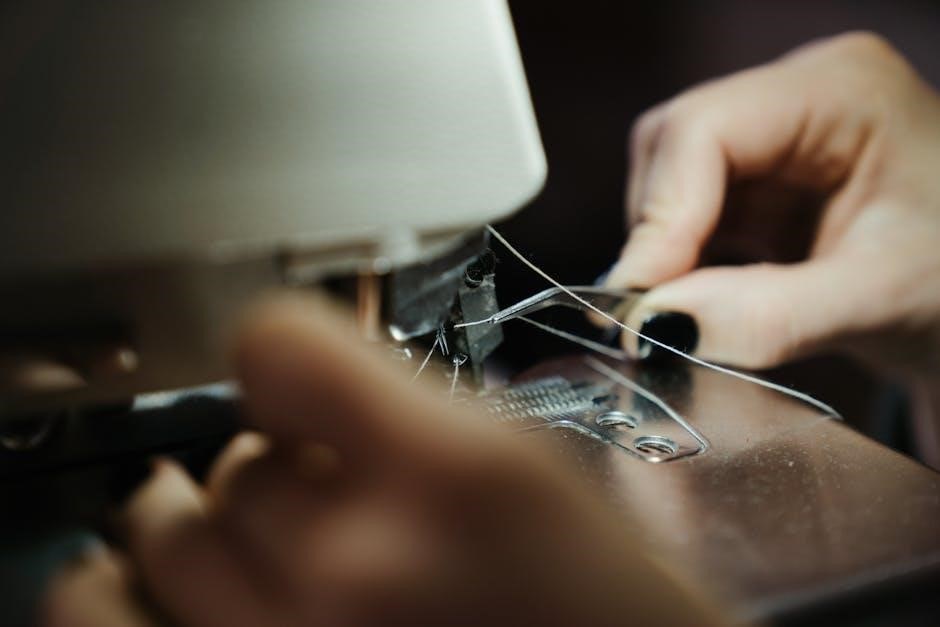
3.3 Initial Threading and Bobbin Preparation
Start by referencing the built-in threading chart on the machine. Guide the thread through the tension discs and take-up lever, ensuring it’s seated correctly. Gently pull the thread to ensure proper alignment. For the bobbin, wind it evenly and place it in the drop-in bobbin case. Insert the bobbin into the machine, ensuring it clicks into place. Proper threading and bobbin preparation are essential for smooth stitching and optimal performance.
Threading and Bobbin Management
Master the essentials of threading and bobbin preparation for the Singer 401a. This section provides clear, step-by-step guidance to ensure smooth stitching and optimal machine performance.
4.1 Step-by-Step Guide to Threading the Machine
Threading the Singer 401a requires precision. Start by turning the machine on and raising the take-up lever. Gently pull the thread through the tension discs, then guide it through the channel. Pass the thread behind the take-up lever, ensuring it’s seated correctly. Insert the thread into the needle’s eye, leaving a small loop. This process ensures proper tension and smooth stitching.
4.2 Proper Bobbin Winding Techniques
For the Singer 401a, start by selecting the correct thread type. Place the bobbin on the winder, holding it steady. Wind thread evenly, avoiding overfilling. Stop when the bobbin is about 80% full. Trim excess thread and insert the bobbin into the machine, ensuring it’s securely seated; Proper winding ensures consistent stitching and prevents machine jams or thread breakage during sewing.
Understanding the Stitch Chart
The Singer 401a features a built-in stitch chart, providing clear visibility of available stitches. It includes straight, zigzag, and decorative options, allowing users to easily select and customize stitches for various fabrics and projects, enhancing sewing efficiency and creativity.
5.1 Types of Stitches Available on the Singer 401a
The Singer 401a offers a variety of stitches, including straight, zigzag, and decorative options. It features a built-in stitch chart with clear markings for easy selection. Users can choose from multiple stitch lengths and widths, making it ideal for sewing different fabrics and creative projects. The machine also includes specialized stitches for tasks like satin stitching and heavy-duty sewing, ensuring versatility and precision.
5.2 Adjusting Stitch Length and Width
The Singer 401a allows precise adjustment of stitch length and width using convenient dials. Stitch length controls the distance between stitches, while width adjusts for zigzag and decorative stitches. Users can fine-tune these settings to suit different fabrics and sewing tasks, ensuring professional-quality results. Proper adjustment ensures even stitching and prevents fabric puckering or stretching during sewing projects.

Maintenance and Care
Regular cleaning and lubrication of moving parts are essential for optimal performance. Check for wear and tear, and refer to the manual for specific care instructions.
6.1 Cleaning the Machine Regularly
Regular cleaning ensures the Singer 401a operates smoothly. Turn off and unplug the machine, then remove debris using a soft brush. Gently wipe surfaces with a dry cloth. Avoid harsh chemicals or liquids. Clean the bobbin area and feed dogs regularly. For detailed steps, refer to the manual to maintain your machine’s performance and longevity effectively.
6.2 Lubricating Moving Parts
Regular lubrication is essential for the Singer 401a’s smooth operation. Apply a few drops of sewing machine oil to moving parts like the shuttle hook and bearings. Do this every 50 hours of use or when you notice friction. Avoid over-lubrication, as excess oil can attract dust. Refer to the manual for specific areas to lubricate and maintain your machine’s longevity and performance efficiently.
6.3 Troubleshooting Common Issues
Troubleshooting the Singer 401a involves addressing common issues like thread jams, uneven stitches, or bobbin problems. Regularly clean the machine to prevent dust buildup. Check thread tension and ensure proper needle alignment. If the machine skips stitches, inspect the needle for damage or incorrect installation. Refer to the manual for step-by-step solutions to resolve issues quickly and maintain smooth operation.
Accessories and Additional Features
The Singer 401a offers various accessories, including specialized attachments for embroidery, quilting, and heavy-duty sewing, enhancing versatility and allowing users to tackle diverse projects with ease.
7.1 Available Accessories for the Singer 401a
The Singer 401a comes with a range of accessories, including various presser feet like zipper, buttonhole, and embroidery feet, additional bobbins, needles, and specialized attachments for quilting and heavy-duty sewing. These accessories enhance the machine’s versatility, allowing users to tackle diverse sewing projects with precision and ease. They are available through Singer-authorized dealers or online retailers.
7.2 Optional Attachments for Specialized Sewing
Optional attachments for the Singer 401a include a ruffler foot for gathering fabric, a gathering foot for creating ruffles, and a quilting guide for precise stitching. These attachments expand the machine’s capabilities, enabling users to tackle specialized projects like home decor, quilting, and heavy-duty sewing with ease. They are designed to enhance creativity and precision, ensuring professional-quality results for every stitch.
User Guide and Instructions
This section provides step-by-step instructions for navigating the Singer 401a manual, understanding diagrams, and troubleshooting common issues. It ensures users can operate the machine confidently.
8.1 Navigating the Manual for Beginners
Welcome to the Singer 401a manual! This section is designed to help beginners navigate the guide effortlessly. Start by familiarizing yourself with the table of contents, which outlines key features and troubleshooting tips. The manual is structured to guide you through setup, operation, and maintenance with clear, step-by-step instructions. Use the diagrams and illustrations to better understand each component and function; This section ensures you can confidently operate and care for your Singer 401a sewing machine, making your sewing experience smooth and enjoyable.
8.2 Understanding Diagrams and Illustrations
The diagrams in the Singer 401a manual are essential for understanding machine components and operations. They include stitch charts, bobbin threading guides, and part diagrams. These visuals simplify complex steps, making it easier to thread the machine or select the right stitch. Refer to the diagrams when introduced to new techniques or features for clearer guidance.
Safety Precautions
Always prioritize safety when using the Singer 401a. Keep loose clothing tied back, avoid overloading the machine, and handle needles and electrical parts with care.
9.1 General Safety Tips for Sewing Machines
Always keep loose clothing and long hair tied back when operating the Singer 401a. Ensure the machine is placed on a stable, flat surface. Avoid overloading the machine with excessive fabric. Keep fingers away from moving parts, especially the needle. Never touch electrical components with wet hands. Store the machine out of children’s reach and unplug it when not in use for extended periods.
9.2 Avoiding Common Hazards
Avoid operating the Singer 401a in damp environments or near water to prevent electrical hazards. Keep the sewing area clear of clutter to avoid accidents. Never force fabric through the machine, as this can damage the mechanism. Regularly inspect and replace worn-out needles to prevent breakage. Ensure the machine is properly mounted to avoid tipping, and always use the correct voltage to prevent electrical issues.

Frequently Asked Questions (FAQs)
Common questions include troubleshooting issues, maintenance tips, and repair guidance. Users often inquire about threading, bobbin management, and optimizing stitch quality for various fabrics and projects.
10.1 Common Queries About the Singer 401a
Users often inquire about threading techniques, bobbin management, and troubleshooting common issues. Questions also focus on optimizing stitch quality for different fabrics and understanding the built-in stitch chart. Many seek guidance on maintenance routines, such as cleaning and lubricating the machine, to ensure longevity and smooth operation. Additionally, queries about compatible accessories and repair options are frequently raised.
10.2 Solutions to Frequently Encountered Problems
Common issues like thread jams or uneven stitching can be resolved by checking thread tension and ensuring proper bobbin alignment. For machine malfunction, refer to the troubleshooting section or consult authorized service centers. Regular cleaning and lubrication prevent mechanical issues. Always follow manual guidelines for optimal performance and address problems promptly to maintain the machine’s efficiency and extend its lifespan effectively.

Repair and Service Information
For repairs, locate authorized Singer service centers or attempt DIY fixes using the manual. Regular servicing prevents major issues and ensures smooth machine operation.
11.1 Finding Authorized Service Centers
To locate authorized Singer service centers, visit the official Singer website or contact local Singer dealers. These centers provide expert repair services, ensuring your machine is serviced with genuine parts. Regular maintenance by authorized technicians guarantees optimal performance and preserves your warranty. For reliable and professional care, always choose Singer-authorized service providers.
11.2 DIY Repairs and Maintenance Tips
For minor repairs, clean the machine regularly and lubricate moving parts to ensure smooth operation. Check the bobbin area for thread buildup and replace needles as needed. Refer to the manual for guidance on basic adjustments. For complex issues, consider consulting DIY repair guides or seeking assistance from experienced sewists to avoid further damage.
The Singer 401a sewing machine manual provides comprehensive guidance for setup, operation, and maintenance. By following these instructions, users can maximize their machine’s potential and enjoy seamless sewing experiences.
12.1 Summary of Key Points
The Singer 401a manual provides a comprehensive guide to setup, operation, and maintenance. It covers threading, stitch selection, and troubleshooting, ensuring users master basic to advanced techniques. With clear instructions and diagrams, the manual caters to both beginners and experienced sewists, emphasizing proper care and usage for optimal performance and longevity of the machine.
12.2 Final Tips for Optimal Usage
Regularly clean and lubricate the machine to maintain performance. Always use the correct needle type and thread for your fabric. Properly wind bobbins and thread the machine as instructed. Utilize the built-in stitch chart for selecting the right stitches. Keep the machine well-lit and follow safety precautions. Refer to the manual for troubleshooting and complex tasks to ensure longevity and optimal sewing results.